この記事はGitHub Actions - Qiita Advent Calendar 2024 - Qiita 6日目の記事です(現在12/18ですが、たまたまネタがあったので空いている日に入れてみました)。
GitHub Actionsを使ってリリースを自動化してみたので、私が作った設定を紹介します。
前提
- bump-my-versionでソフトウェアのバージョンを上げる
- bump-my-versionはバージョンを上げるとGitタグを打ってソースコード中のバージョン番号を更新してくれる
- バージョンアップは作業用ブランチで行い、Pull Requestを作成する
- バージョン番号入りのGitタグを打ったPull Requestをマージするとリリースされる
bump-my-versionの設定
pyproject.tomlに以下の内容を書きます。
[tool.bumpversion]
current_version = "0.0.0"
parse = "(?P<major>\\d+)\\.(?P<minor>\\d+)\\.(?P<patch>\\d+)"
serialize = ["{major}.{minor}.{patch}"]
search = "{current_version}"
replace = "{new_version}"
regex = false
ignore_missing_version = false
ignore_missing_files = false
tag = true
sign_tags = false
tag_name = "v{new_version}"
tag_message = "Bump version: {current_version} → {new_version}"
allow_dirty = false
commit = true
message = "Bump version: {current_version} → {new_version}"
commit_args = ""
setup_hooks = []
pre_commit_hooks = []
post_commit_hooks = []

[[tool.bumpversion.files]]
filename = "release.sh"
search = "CURRENT_VERSION=\"v{current_version}\""
replace = "CURRENT_VERSION=\"v{new_version}\""
リリース用スクリプトのコード
プロジェクト直下にrelease.shを作成し、以下の内容を書きます。
#!/bin/sh
set -e

CURRENT_VERSION="v0.0.0"
LATEST_RELEASE=$(gh release list --json isLatest,name -q '.[] | select(.isLatest == true) | .name')

if [ "$CURRENT_VERSION" = "$LATEST_RELEASE" ]; then
  echo "Current version ($CURRENT_VERSION) is already released"
  exit 0
fi

gh release create $CURRENT_VERSION --generate-notes
GitHub Actionsの設定
.github/workflows/release.ymlを作成し、以下の内容を書きます。
name: Release

on:
  pull_request_target:
    types:
      - closed

jobs:
  release:
    if: github.event.pull_request.merged == true
    runs-on: ubuntu-latest
    permissions:
      contents: write
    steps:
      - name: Checkout the code
        uses: actions/checkout@v4
      - name: Release
        run: ./release.sh
        env:
          GH_TOKEN: ${{ secrets.GITHUB_TOKEN }}
          # GitHub Enterpriseの場合は上記の代わりに以下のように設定する
          # GH_ENTERPRISE_TOKEN: ${{ secrets.GITHUB_TOKEN }}
          # GH_HOST: "example.com"  # GitHub Enterpriseのホスト名
bump-my-versionを実行してPRを作成してくれるGitHub Actionsワークフロー
このワークフローは必須ではありませんが、bump-my-versionの実行をローカル以外でもやりたい場合に役立ちます。
.github/workflows/bump-version.ymlを作成し、以下の内容を書きます。
name: Bump version

on:
  workflow_dispatch:
    inputs:
      bump-type:
        description: 'Bump type'
        required: true
        default: 'patch'
        type: choice
        options:
        - major
        - minor
        - patch

jobs:
  build:
    runs-on: ubuntu-latest

    permissions:
      contents: write
      pull-requests: write

    env:
      BRANCH_NAME: bump-version-${{ github.run_id }}

    steps:
      - name: Checkout the code
        uses: actions/checkout@v4

      - name: Setup Git
        run: |
          git config user.name "github-actions[bot]"
          git config user.email "41898282+github-actions[bot]@users.noreply.github.com"

      - name: Setup python
        uses: actions/setup-python@v5
        with:
          python-version: '3.12'
          cache: 'pip'

      - name: Install bump-my-version
        run: |
          python -m pip install --upgrade pip
          pip install bump-my-version

      - name: Bump version
        run: |
          git checkout -b ${{ env.BRANCH_NAME }}
          bump-my-version bump ${{ inputs.bump-type }}
          git push origin ${{ env.BRANCH_NAME }} --tags -f

      - name: Check
        run: |
          gh pr create -f
        env:
          GH_TOKEN: ${{ secrets.GITHUB_TOKEN }}
          # GitHub Enterpriseの場合は上記の代わりに以下のように設定する
          # GH_ENTERPRISE_TOKEN: ${{ secrets.GITHUB_TOKEN }}
          # GH_HOST: "example.com"  # GitHub Enterpriseのホスト名
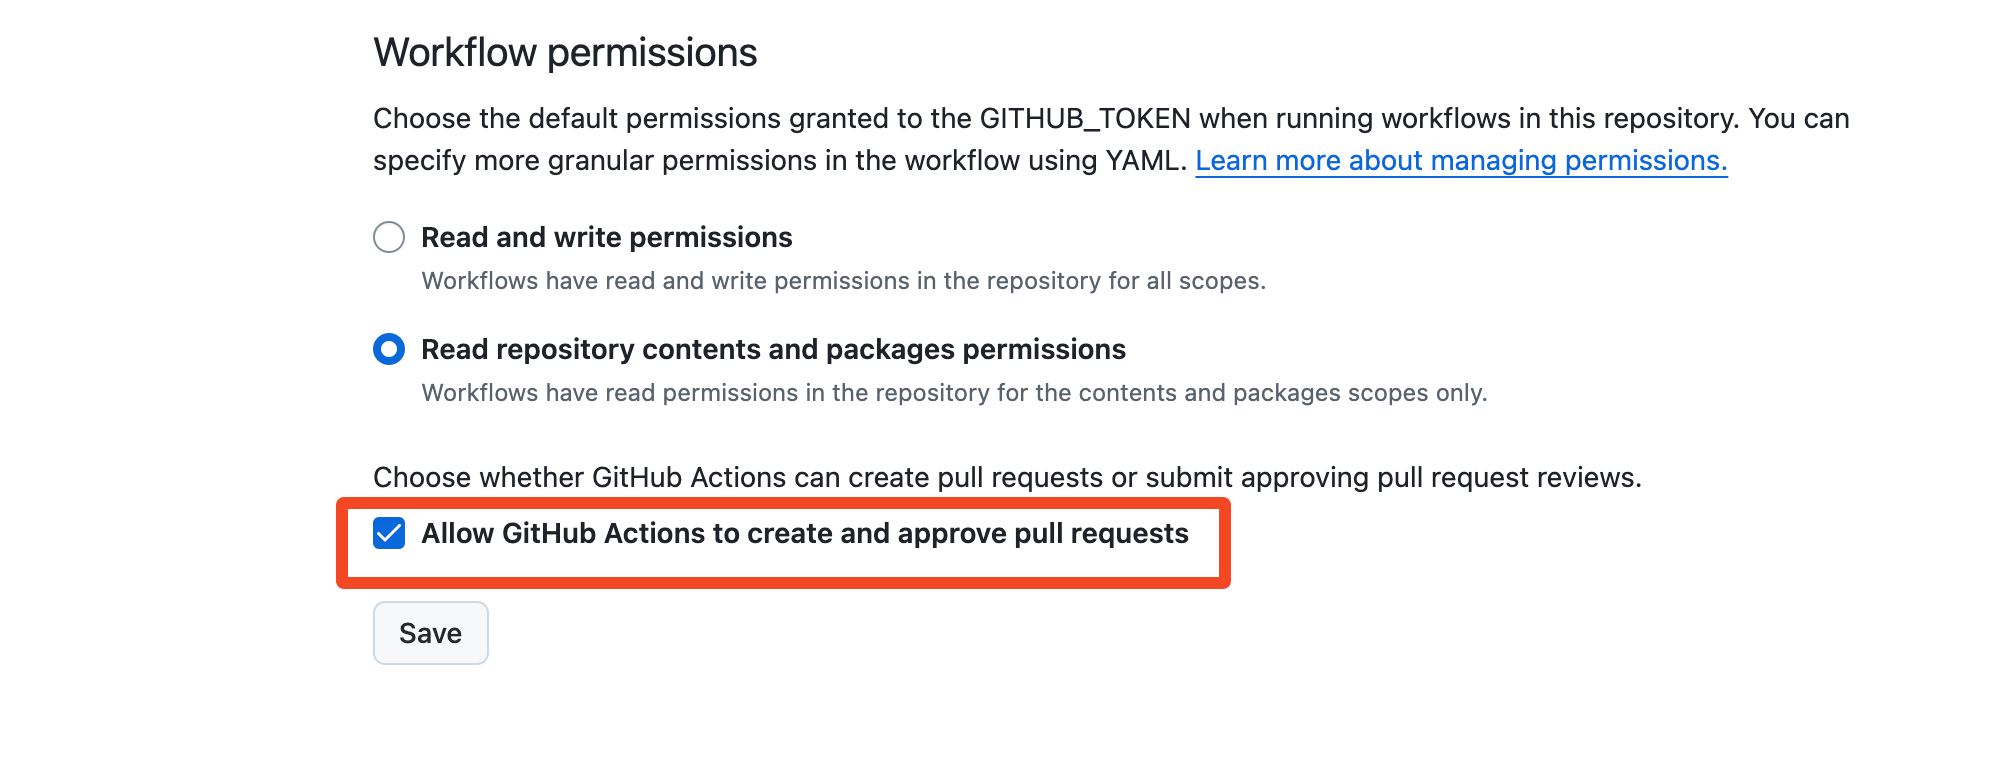
上記のワークフローはデフォルトの権限では動きません。 該当リポジトリの「Settings」-「Actions」-「General」を開き、「Allow GitHub Actions to create and approve pull requests」にチェックを入れる必要があります。 Organizationの設定で上記を実施できない場合は、Organizationの管理者に連絡して「Allow GitHub Actions to create and approve pull requests」を有効にしてもらってください。

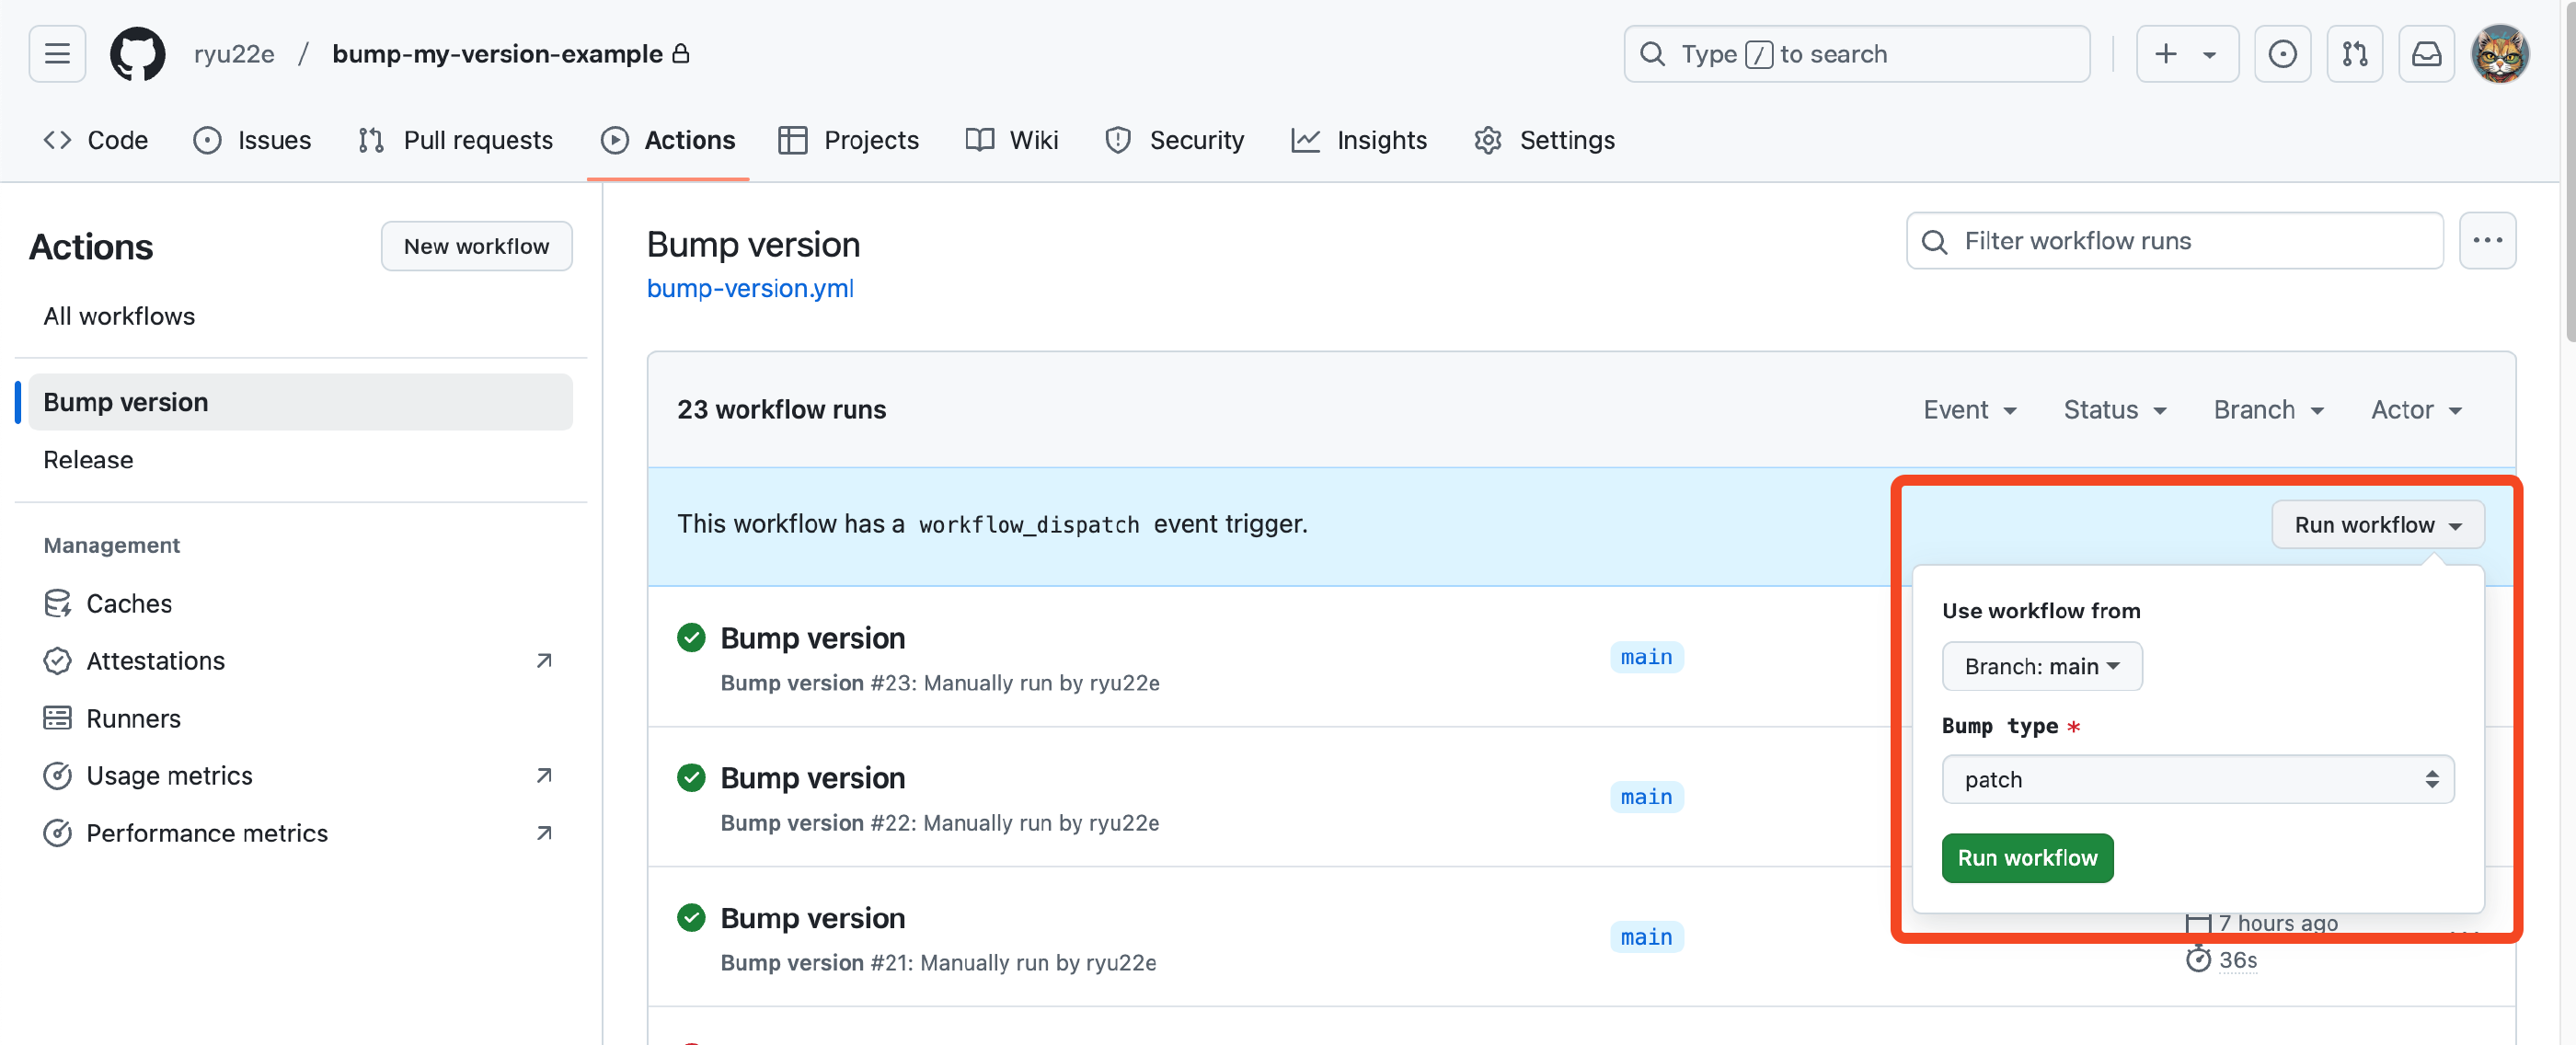
上記のワークフローは、該当リポジトリの「Actions」-「Bump version」から手動で実行できます。

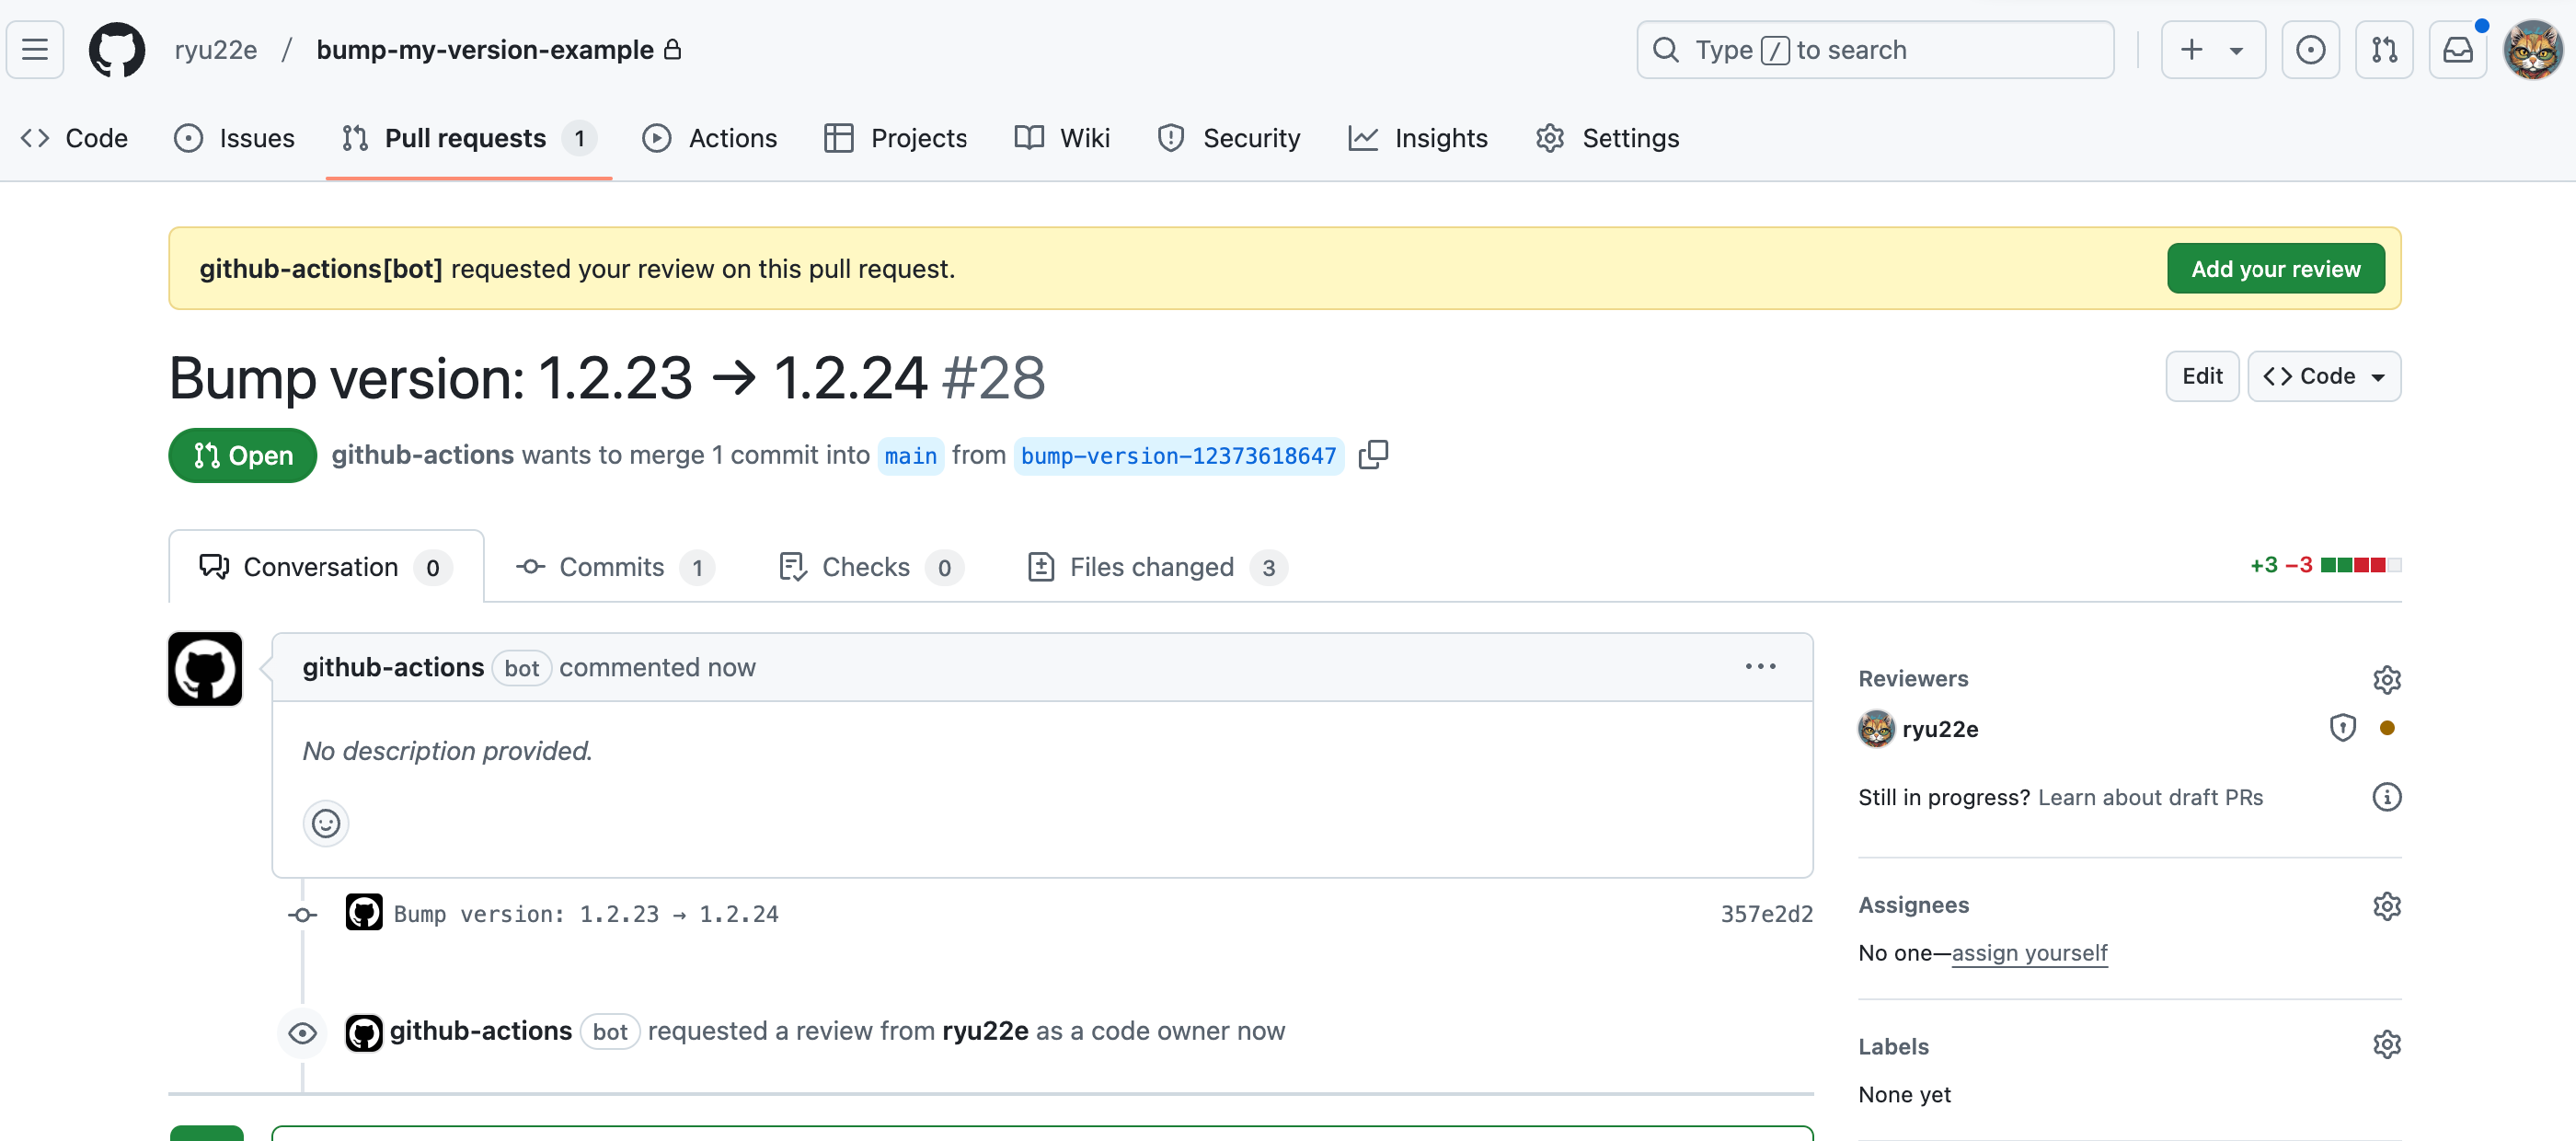
ワークフローの実行に成功すると、以下のようにPRが作成されます。

参考URL
- callowayproject/bump-my-version: A small command line tool to simplify releasing software by updating all version strings in your source code by the correct increment and optionally commit and tag the changes.
- GitHub Actions で GitHub CLI を使う
- GitHub CLI | Take GitHub to the command line
- Github ActionsからPRを作成・承認する設定を有効化する方法
- GitHub ActionsでのPR操作権限はデフォルトでオフになったよ